Hydraulic Surge Drum Brake Kit Installation
A: INTRODUCTION  The hydraulic surge brake system is a totally trailer self contained braking system. It requires no interconnection of any mechanical or electrical components to the tow vehicle (other than the brake coupler itself) to provide totally automatic and proportional operation of the trailer brakes. It utilizes the inertial differential pressure created between the tow vehicle and the trailer during tow vehicle braking to create a proportional mechanical pressure which is applied to the pushrod of the brake coupler master cylinder. This results in a hydraulic output which is proportional to the braking pressure being applied to the tow vehicle, and results in a totally automatic and regulated operation of the trailer's brakes.
 NOTE:
NOTE:
- The 6000# capacity rating of this surge brake system is only available when the system is used with two brake axles. When used with one brake axle, the system braking capacity is 3500# which is the capacity of the axle.
- This brake system is supplied with freebacking brakes, which automatically disengage when the trailer is backing up.
- When only one brake axle is being installed on a tandem axle trailer, the brakes should be on the rear axle for maximum system performance. Rotational torque applied to axles during braking shifts the equalizer and applies more weight to rear axle. If brakes are installed on the front axle, the wheel may skid during braking. Brakes on rear axle are more effective as the equalizers shifts and the rear tires dig in to the pavement.
Prior to beginning the brake system installation, it must be determined whether or not your existing axle is compatible with the 6054 BRAKE KIT components. The axle which is receiving the retrofit brake components must have:
- A square 4-hole brake flange in place on the axle immediately behind the existing idler hub, and

- The existing idler hubs must have bearings # 68149 as the inner bearing (next to the seal) and bearing # 44649 as the outer bearing next to the spindle nut.
Note: The bearing numbers are etched onto the edge of the bearings. If your existing axle has these components parameters, it should be compatible with the 6054 BRAKE KIT.
- >
B: INSTALLATION
- Elevate trailer frame.
Jack the trailer totally off the ground, supporting the frame securely. (DO NOT use the tongue jack as the front end support while working on the trailer!) The retrofit brake kit installation can be done with the boat on the trailer, however for safety and ease of working, we highly recommend that you remove the boat from the trailer during the installation.
- Brake cluster installation
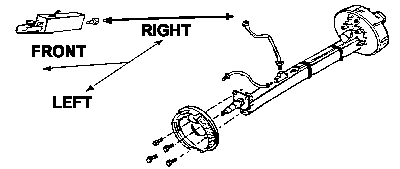
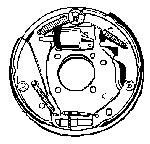
Remove the existing idler hubs and mount the hot dip galvanized brake clusters onto the 4-hole brake flange with the 7/16" x 1" nuts and bolts supplied. (Torque bolts to 50ft pounds.) Be sure to mount the brake clusters (LEFT) on driver's side and (RIGHT) on passengers side with the wheel cylinder on top. The tags identifying the Left or Right brake cluster are on the rear of the brake cluster. If the tag identifying Left or Right is missing, you can still correctly orient the brake clusters by observing the position of the push rod on the brake cluster wheel cylinder.

WITH THE WHEEL CYLINDER ON TOP, THE PUSH ROD ON THE WHEEL CYLINDER ALWAYS FACES FORWARD (TOWARD THE TONGUE OF THE TRAILER).
- (OPTIONAL) WASHDOWN KIT PLASTIC NIPPLE PRE-INSTALLATION
Now you will install the black male plastic adapter nipples from the FRESH WATER WASHDOWN KIT into the brake cluster backing plates. Remove the red plastic plugs closest to the rear of the trailer from the backing plate. It is into these 3/8" dia. holes that you will tap the 1/2" x 3/8" adapter nipples. Install the plastic nipples with the smaller 3/8" side protruding thru to the outside rear of the brake cluster.
- HUB INSTALLATION
You are now ready to install the hub drums onto the axle. If you are using an existing plain spindle axle on your trailer, YOU MUST PRE PACK YOUR BEARINGS AND HUB DRUMS BEFORE INSTALLING THEM.

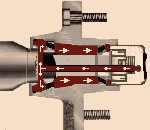
 If, however, you are installing a new CHAMPION SPINDLE- LUBE® axle, it is not necessary to pre-grease (prepack) your bearings and hub drums. With the SPINDLE-LUBE® axle, the bearings can be installed dry and then, because the SPINDLE-LUBE axle contains a builtin hub packing tool in each spindle, you can properly pack grease into your hub drums and bearings after they have been installed on the axle.
